Lumion BLOG
Feel the space with Lumion
Visualize your conceptual designs in Lumion 8
TweetShareShareShareIt’s the early days of a new-build, high-end residential project and you want to share your designs with the client.
You’ve gone through a process of sketching on paper and modeling on the computer. You’re enthusiastic about the project’s strong, artful shape, but you’re unsure about the materials. Now is the time for feedback from your client, but what you need is a conceptual story rather than a photorealistic one. That’s the challenge.

Hand-sketching has traditionally played a role in this kind of conceptual communication, but when it comes to engaging your client with a clear representation of the project, it can help to consider making a few artistic, 3D renders.
With Lumion 8, you can ease the process of creating conceptual sketches by quickly rendering with the many artistic tools available.

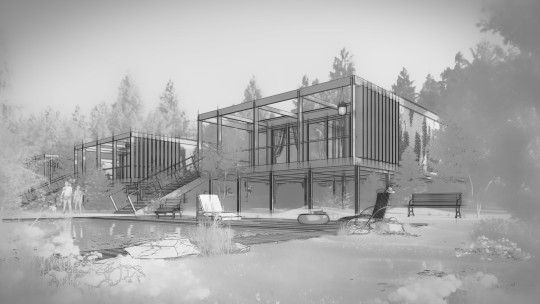
By using the new Outlines effect in Lumion 8, you can instantly create a stylish B&W sketch, like with the WoodBox House above.
In this blog post, you’ll explore several of Lumion’s concept rendering options that can help communicate your project while focusing on the specific details of your design.
Instant conceptual renders with the Styles button
Combinations of carefully-chosen effects can be added with a single click through the Styles preset button. This process eliminates the need to combine and tweak various effects, and by choosing the style you want, you can immediately produce a balanced and professional-looking image.
The Lumion editor below shows a scene in Lumion 8 with the Watercolor Style selected.

On the left-hand side of the screenshot above, you can see that a number of effects have been combined to create the conceptual style you eventually see in the output.

Example of the Watercolor Style.
The other conceptual Styles preset is Color Sketch, which gives your render a more hand-drawn look as opposed to a painted look. You can apply the Color Sketch Style in literally seconds:

With this simple application, you can achieve an artistic result that serves as a powerful representation of your design concept.

Example of the Color Sketch Style.
In seconds, the Styles preset transforms your model into a beautiful, captivating render, and due to the speed and ease of the Styles button, you can start pumping out dozens of renders in a single day.
Nevertheless, we know that many architects don’t want a cookie-cutter render. This is where the Styles preset truly shines as an architect’s conceptual tool. For instance, when applying the Color Sketch preset, you have a stack of pre-configured effects ready to be modified at a click-and-drag of your mouse.
To start, click on the effect and make the necessary modifications. In this instance, we used Color Correction to de-saturate the image:

After modifying a Style, you should notice a few changes to the interface, namely the color of the effect you modified.

Reversing the changes you made to a Styles effect is as simple as double-clicking the undo/remove button located immediately to the right of the effect.
When you want to temporarily turn on/off an effect, click on the “eye” icon to enable/disable the effect.

Example of how to enable/disable effects.
Through the Styles button, you can instantly achieve an artistic-looking render, but you don’t have to solely produce cookie-cutter images and videos.
Instead, you can create your own, unique style by using the pre-configured effect stack and making some quick, yet effective, modifications.
How to use the Outlines effect and Lumion’s other artistic options
After importing a basic model into Lumion, you’ll find an infinite number of ways to create a conceptual render. And that’s not an exaggeration.
You can start exploring Lumion’s wide range of artistic options simply by playing around with different effects, but the first you should learn is the Outlines effect. You can learn more about Outlines in the video below with expert Chris Welton.
Now that you know the Outlines effect, you can start combining it with different effects and styles for a truly remarkable result. Let’s go through some of these styles with a luxury residential home concept.

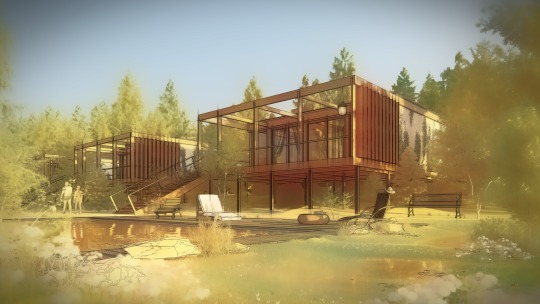
Photorealistic render. Although photorealism is a great way of showing your concept designs, you may be looking for a faster rending option. This is where the dreamy, artistic effects in Lumion can help you.
You can find the Outlines effect in the image and video modes. Simply click on the Fx button to add effects, and then choose the Sketch tab to find the Outlines effect.

By adding the Outlines effect to your render, you can instantly draw attention to the borders and the mass of the home.

Photorealistic render with the Outlines effect added.
Whether for photorealism or an artistic concept, the Outlines effect highlights borders and creates a distinction between spaces and structures. Let’s see how the Outlines effect plays with the other artistic options in Lumion.
Painting

The Painting effect simulates brush strokes on canvas for a more impressionistic feel.
Pastel Sketch

The Pastel Sketch effect provides smooth tones with soft colors and blurry outlines. Eight pastel presets are available.
Watercolor

The Watercolor effect uses color bleeding to give an impressionist feel. Use this effect with the Outlines effect to make your building “pop” out of its colorful, attractive background.
Sketch

Simulate the hand-drawn look in seconds with the Sketch effect. Adding and removing color is extremely easy as well, giving you the choice between color and B&W rendering.
Manga

The Manga effect simulates the animation style popular in Japan. With this effect, you can make the colors “pop” and achieve a strong emphasis on straight lines and the form of your model.
Cartoon

The Cartoon option places your model in an animated world with softened colors and a clear distinction between spaces.
Oil Painting

Make your 3D render resemble a museum masterpiece with the Oil Painting effect. With this effect, brushstrokes are simulated to give the render an impressionist feel.
Blueprint

The Blueprint effect is one of the clearest concept rendering options as it shows the very basics of your design.
While options like Painting and Watercolor provide an impressionistic, artistic feel, the Outlines effect ensures that you (or your client) can easily understand the mass and the shape of the project.
Breaking down a concept render
If your model is ready and imported into Lumion, the only remaining parts are landscaping, basic texturing and adding entourage. After going through these steps, you can really go trigger-happy pumping out concept render after concept render.
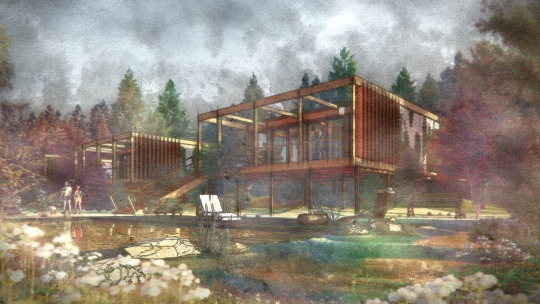
To give you a headstart in concept rendering, we’ll briefly take a look at how the following render was produced.

To start, we modified the Realistic Style and then added several effects. The complete effect arrangement looked like this:

Producing the style in the above image meant lowering the sun height to 0.057, turning down the temperature (0.6) and turning up the brightness (0.7) of Color Correction, and increasing the Depth of Field amount to 26.7.
In addition to adapting the Realistic Style settings, this concept render also required a few other settings, including:
Watercolor
- Accuracy at 2.0
- Radial accuracy at 2.0
- Depth accuracy at 1.7
Outlines
- Color variation at 2.0
- Transparency at 1.8
- Outline density at 1.6
Analog Color Lab
- Style at 1.0
- Amount at 0.7
Of course, many other effects were fine-tuned and tweaked to achieve the style of the watercolor render above, but with these three simple effects (Watercolor, Outlines and Analog Color Lab), you have the foundation for an interesting conceptual style.
From photorealism to your own signature style
In these early project phases, your goal may be to keep the discussion on the project’s function and the form. You need basic scaling and massing questions answered, and you know the in-depth design questions, such as those concerning materials, aren’t quite relevant yet.
This is where the Styles preset and the Outlines effect can really take your conceptual rendering to new heights. To learn more about these features and others, you can find hundreds of video tutorials on our Tutorials page.
#Lumion