Lumion BLOG
Feel the space with Lumion
It’s Curtains!
TweetShareShareShareTransparent or translucent materials add style through texture, especially in the form of curtains. Lumion 7 comes with curtain presets in its materials library. You can also add variable amounts of transparency or translucency, to achieve spectacular results with the bonus that it’s simple to do.
This blog explains how to apply these materials properties and shows some beautiful examples, all made in Lumion 7, of what you can achieve with just a little light, love and imagination.

Above: Curtains on a pergola, blowing in the wind

Above: A stylish bedroom, with a lot of transparent fabrics

Above: Spectacular poolside in the foothills of snow-capped mountains!

Above: A beautiful render of a simple and stylish bedroom.
Adding curtain presets in Lumion 7 is easy. The tutorial below shows you how.
Above: Tutorial showing how to apply Curtain presets
Transparency and translucency can be adjusted independently in Lumion 7.
Transparency means that light travels through a material without an interaction taking place between the light and the material. The amount of light that passes through the material depends on how transparent (or opaque) the material is.

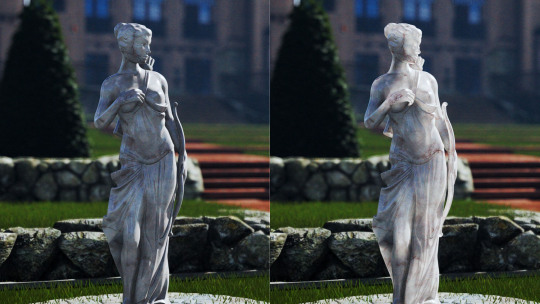
Above: Translucency (waxiness) applied to a marble statue
Translucency, on the other hand, means that light travels partially through a material and interacts with it in such a way that the material itself appears to look more or less “waxy”.
In Lumion 7 you therefore have two sliders: A ‘transparency’ slider and a ‘waxiness’ slider. The tutorial below shows you how to use these.
Above: Tutorial showing how to apply transparency and translucency (waxiness)

Above: A blustery day with butterflies in the garden!
For more about applying materials in Lumion click here. To read more about the materials features in Lumion 7.3, visit the Lumion what’s new page.
#Lumion